The concept behind this project is to add two layers of security for accessing your home/office PC. In the first step a user is required to swipe an RFID tag in front of the system to physically start the system while the next step runs a script that sends an SMS to the users cell phone with a custom message “Your PC was started” (in this project) along with a timestamp.
Materials used This projects will require few electronic components
- Arduino promini
- EL817 Optocoupler Link
- Perf board
- 100 Ohm resistor
- EM-18 Or similar RFID Reader Link
- RFID Tag Link
- Connecting Wires & Other Mounting Hardware
Note: Optocoupler was used here as we want to keep the circuit isolated from the PC Motherboard.
On the Software side of things we will be using Python2.x/3.x , Twilio and the OS of your choice (Ubuntu 16.04 here)
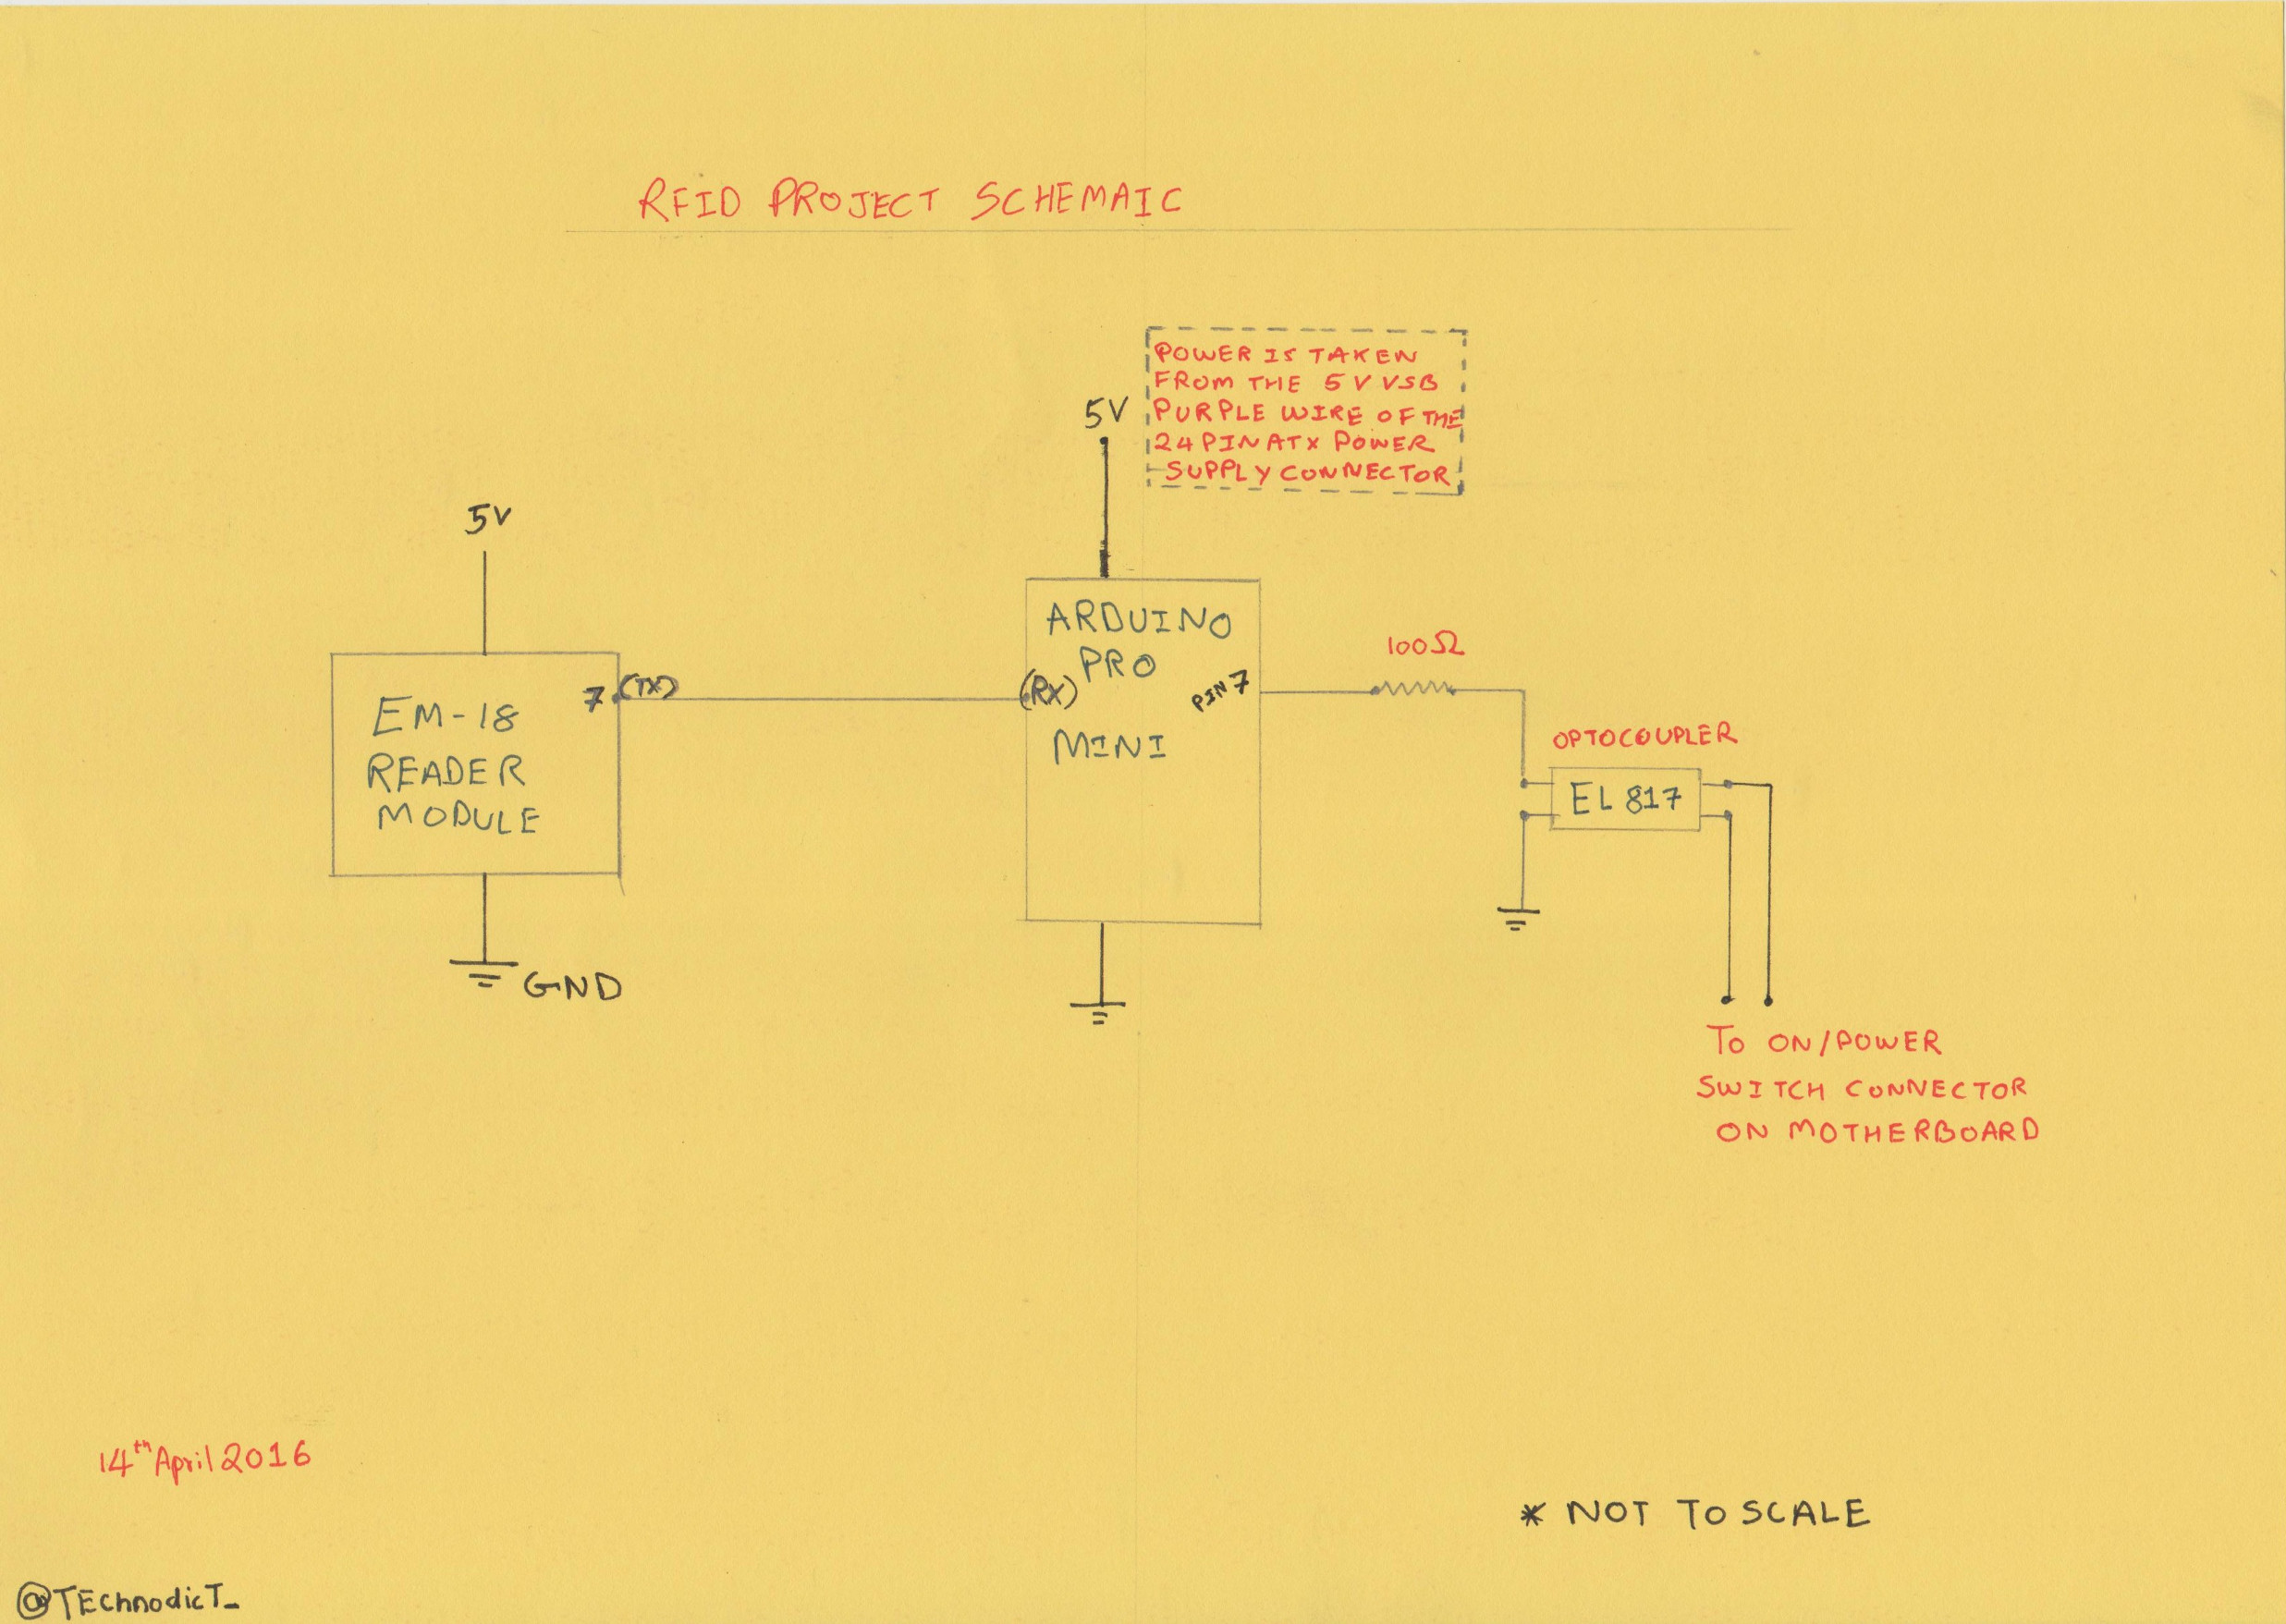
The Circuit
The schematic for the RFID system is shown above:
Find the wires that go to the push button / power button on your PC and disconnect them. Connect the corresponding wires to the above circuit as shown in schematic
The Code
/* Arduino Simple RFID Access Control
Using EM-18 RFID Reader Module

*/

#define RELAYPIN 7

char tag[] ="04009DAxxxxx"; // Replace with your own Tag ID
char input[12];             // A variable to store the Tag ID being presented
int count = 0;              // A counter variable to navigate through the input[] character array
boolean flag = 0;           // A variable to store the Tag match status
void setup()
{
    Serial.begin(9600);     // Initialise Serial Communication with the Serial Monitor
    pinMode(RELAYPIN,OUTPUT);   // RELAY OUTPUT

}
void loop()
{
    if(Serial.available())// Check if there is incoming data in the RFID Reader Serial Buffer.
    {
        count = 0; // Reset the counter to zero
        /* Keep reading Byte by Byte from the Buffer till the RFID Reader Buffer is empty
           or till 12 Bytes (the ID size of our Tag) is read */
        while(Serial.available() && count < 12)
        {
            input[count] = Serial.read(); // Read 1 Byte of data and store it in the input[] variable
            count++; // increment counter
            delay(5);
        }
        /* When the counter reaches 12 (the size of the ID) we stop and compare each value
            of the input[] to the corresponding stored value */
        if(count == 12) //
        {
            count =0; // reset counter varibale to 0
            flag = 1;
            /* Iterate through each value and compare till either the 12 values are
               all matching or till the first mistmatch occurs */
            while(count<12 && flag !=0)
            {
                if(input[count]==tag[count])
                flag = 1; // everytime the values match, we set the flag variable to 1
                else
                flag= 0;
                               /* if the ID values don't match, set flag variable to 0 and
                                  stop comparing by exiting the while loop */
                count++; // increment i
            }
        }
This Concludes the hardware part of the project
Twlio Client
Twilio is a great SMS API for Text Messaging , VoIP and Voice, which can be scaled and used for much powerful applications then it will be used in the scope of this project. Theres a lot to explore there and they have some great docuemntation over at their website at TWILIO
A Twilio account needs to be registered to use their services, Twilio provides a limited serivce, free account with a phone number that you can choose from options and will have to verify.
Note: With a free twilio account you can send SMS's only to your registered phone number
This is the Python code for using the Twilio API
1 2 3 4 5 6 7 8 9 10 11 12 13 14 15 16 | |
This script when executed from your terminal will send your specified message to your registered phone number.Now we want to start this script each time our PC boots. We have two options to go about this in Ubuntu.
One way is to write a systemd service and the other is to use include this script in rc.local folder that is used to run startup scripts This tutorial will use the later way
On your Linux computer, navigate to /etc and edit the file rc.local using your preferred editor.This script (rc.local) usually has no content except for a few comments. Add the Absolute path to your script in rc.local to execute it on boot each time.
Go Top